Categories
JavaScript Interview Questions

JavaScript Interview Questions: Events in Detail

To get a job as a front-end developer, we need to nail the coding interview.

In this article, we’ll look at questions about handling events within front-end JavaScript.


How Are Event Handlers Used in JavaScript?

Events are actions that result from user activities like clicking a link or typing in text. An event handler is required to run code when an event is triggered in an element.

Event handlers are set as an extra property of an object. For example, if we want to handle an event of a button, then we can write:

const button = document.getElementById('button');
button.onclick = (event) => {
  //...
}

Assuming the button’s ID is button , we can attach an onclick listener to handle click events by setting an event handler function to the onclick property.

The event parameter is an object that has various pieces of information about the event.

We can also use the addEventListener call to do the same thing:

const button = document.getElementById('button');
button.addEventListener('click', (event) => {
  //...
})

The first argument has the event name. The event listener is in the second argument of the addEventListener method call.


What’s the difference between ‘event.preventDefault()' and ‘event.stopPropagation()'?

event.preventDefault() is used to stop the default behavior of whatever element that triggered the event from happening.

If it’s used with a form element, then we prevent it from submitting.

If it’s used with an a element, then preventDefault() prevents it from navigating.

event.stopProgation() is specifically used to stop the propagation of an event and stops an event from occurring in the bubbling and capturing phase.


How Do We Know If ‘event.preventDefault()' Was Used in an Element?

We can check the event.defaultPrevented property in the event object. If it’s true, then event.preventDefault() was called.

What’s ‘event.target’?

event.target is the element on which the event occurred or the element where the event was triggered.

For example, let’s say we have the following HTML:

<div id='div'>
  <button id='button'>
    Click Me
  </button>
</div>

And the following JavaScript code:

const button = document.getElementById('button');
button.onclick = (event) => {
  console.log(event.target.id);
}

When we click the Click Me button, we’ll get button from the console.log since it’s where the click event originated.

This shows that event.target is the element where the event was triggered.

If we add an event handler for the div, as follows:

const button = document.getElementById('button');
const div = document.getElementById('div');
button.onclick = (event) => {
  console.log(event.target.id);
}

div.onclick = (event) => {
  console.log(event.target.id);
}

We also get button logged in there, so event.target is definitely the element where the click event was originated.


What’s ‘event.currentTarget’?

event.currentTarget is the element which attached the event handler explicitly.

For example, say we have the following HTML:

<div id='div'>
  <button id='button'>
    Click Me
  </button>
</div>

And this JavaScript:

const button = document.getElementById('button');
const div = document.getElementById('div');
button.onclick = (event) => {
  console.log(`button.onclick ${event.currentTarget.id}`);
}

div.onclick = (event) => {
  console.log(`div.onclick ${event.currentTarget.id}`);
}

When we click the Click Me button, we see button.onclick button logged from the button.onclick event handler and div.onclick div logged from the div.onclick event handler.

Therefore, we see event.currentTarget is the element we attached to the event handler.


What’s Event Delegation?

Event delegation is where we add event listeners to the parent element instead of adding them to the descendant elements.

The listener will fire on whatever element triggered on the descendant because events bubble up from the element that triggered the event.

It’s useful because we only have a single handler attached to the parent element.

There’s also no need to unbind the handler from the element that’s removed and to bind it to new elements.

For example, if we have the following HTML …

<div id='div'>
  <button id='button-a'>
    Click Me
  </button>
  <button id='button-b'>
    Click Me
  </button>
</div>

… then we can write the following JavaScript code to add event delegation:

const div = document.getElementById('div');

div.onclick = (event) => {
  if (event.target.matches("button#button-a")) {
    alert('Button A clicked');
  } else if (event.target.matches("button#button-b")) {
    alert('Button B clicked');
  }
}

In the code above, get the div by ID, and then attached a click-event handler to it.

Then, in the event-handler function, we check the event.target that invoked the click event by using the matches method.

If the button with the ID button-a is clicked, then we show an alert box with Button A clicked.

And if the button with ID button-b is clicked then we show an alert box with Button B clicked.

As we can see, we only have one event handler, but we did can handle the click events of all the buttons inside.


What’s the Difference Between the Document-Load Event and the Document DOMContentLoaded Event?

The DOMContentLoaded event is fired when the initial HTML document has been completely loaded and parsed without waiting for style sheets, images, and subframes to finish loading.

The load event is only fired after the DOM and all dependent resources and assets have been loaded.


What’s an Event Loop?

The event loop is a single-threaded loop that watches the call stack and checks if there’s any code to run in the task queue.

If the call stack is empty and there’re callback functions in the task queue, then they’ll be dequeued from the task queue and run by pushing them to the call stack.


Conclusion

In JavaScript, we handle events by attaching event listeners to an element.

We can also use event delegation to avoid attaching event listeners to each element. It’s also helpful for handling dynamic-element events since we don’t have to attach and remove event listeners from them with event delegation.

In JavaScript, the event loop is a single-threaded loop that watches the call stack and runs what’s there. If there’s nothing in the call stack, then whatever is in the task queue will be dequeued and run by pushing it to the call stack.

Categories
JavaScript Interview Questions

JavaScript Interview Questions — Basic DOM and Events

To get a job as a front end developer, we need to nail the coding interview.

In this article, we’ll look at DOM manipulation and event questions. If you don’t know what the DOM is then this is a must-read.

What is the DOM?

DOM stands for the Document Object Model. It’s the API for HTML and XML documents. We’re concerned with HTML when looking at what browsers are doing to render the screen.

The HTML elements in a page are put in one big object that can be used by browsers to display elements on the page.

We manipulate the DOM API to manipulate the DOM structure by changing specific elements or nodes in the object. The changes are reflected on the browser screen.

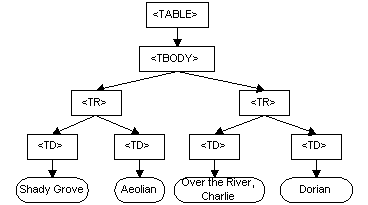
The DOM tree looks something like the following:

The JavaScript document object represents the DOM in the browser.

We can manipulate the DOM tree by finding elements in the DOM tree and then manipulate them by calling the methods or set the properties on the object that’s found.

We can do the by using various methods like document.querySelector, document.getElementById to find one element by CSS selector or ID respectively to return an element or node that we can call methods or set properties on.

Also, we can manipulate a group of objects by document.querySelectorAll to select a group of elements by CSS selector. It returns an array-like object which we can iterate through change things.

What is Event Propagation?

Event propagation occurs when an event is fired on a DOM element. The event is also triggered by the parent elements.

There’s the bubbling phase, where the event bubbles up from the originating node to the parent element, grandparent, and all the way up to window.

Then there’s the capturing phase, where the event starts from window all the way down to the originating element that triggers the event.

Altogether, there’re 3 phases:

  1. capturing phase — event starts from window then goes down all the way to child elements until it reaches the target element.
  2. target phase — event has reached the target element.
  3. bubbling — event bubbles up from the target element and goes up all the way to the window.

What is Event Bubbling?

This is the situation where events start from the element where the event originates from, and then event bubbles up to the parent, grandparent, etc., until it reaches the window object.

For example, if we have the following HTML code:

<div id='grandparent'>
  <div id='parent'>
    <div id='start'>
      Start
    </div>
  </div>
</div>

and the following JavaScript code:

const start = document.querySelector('#start');
const parent = document.querySelector('#parent');
const grandparent = document.querySelector('#grandparent');

start.addEventListener('click', () => {
   alert('start clicked');
 })

parent.addEventListener('click', () => {
   alert('parent clicked');
 })

grandparent.addEventListener('click', () => {
   alert('grandparent clicked');
 })

document.addEventListener('click', () => {
   alert('document clicked');
 })

window.addEventListener('click', () => {
   alert('window clicked');
 })

When we click Start, we should see all the alerts show in the following order:

  1. start clicked
  2. parent clicked
  3. grandparent clicked
  4. document clicked
  5. window clicked

This is because the click event from the div with ID start originates from that div, and then it gets bubbled up to the div with the ID parent, then to the div with ID grandparent.

Then the event goes to the document and the window.

addEventListener takes a third argument, which is to set the useCapture option. Is that’s set to true, then events will occur in the capturing phase instead of the bubbling phase, which is the default.

For example, if we have the following code:

const start = document.querySelector('#start');
const parent = document.querySelector('#parent');
const grandparent = document.querySelector('#grandparent');

start.addEventListener('click', () => {
   alert('start clicked');
 }, true)

parent.addEventListener('click', () => {
   alert('parent clicked');
 }, true)

grandparent.addEventListener('click', () => {
   alert('grandparent clicked');
 }, true)

document.addEventListener('click', () => {
   alert('document clicked');
 }, true)

window.addEventListener('click', () => {
   alert('window clicked');
 }, true)

The alerts will be displayed in the reverse order from what we have before. We can see that capturing is the reverse of bubbling.

What is Event Capturing?

Event capturing is the reverse of event bubbling. This means that events starts from the window all the way to the element that triggered the event.

For example, if we have the following HTML code:

<div id='grandparent'>
  <div id='parent'>
    <div id='start'>
      Start
    </div>
  </div>
</div>

and the following JavaScript code:

const start = document.querySelector('#start');
const parent = document.querySelector('#parent');
const grandparent = document.querySelector('#grandparent');

start.addEventListener('click', () => {
   alert('start clicked');
 }, true)

parent.addEventListener('click', () => {
   alert('parent clicked');
 }, true)

grandparent.addEventListener('click', () => {
   alert('grandparent clicked');
 }, true)

document.addEventListener('click', () => {
   alert('document clicked');
 }, true)

window.addEventListener('click', () => {
   alert('window clicked');
 }, true)

Then when we click Start, we get alerts displayed in the following order:

  1. window clicked
  2. document clicked
  3. grandparent clicked
  4. parent clicked
  5. start clicked

This is because we passed in true to the 3rd argument of addEventListener, which is the argument to set whether useCapture is enabled or not.

The default of the 3rd argument is false, which lets events bubble up instead of being captured.

Setting it to true changes the event to occur in the capturing phase instead of letting it bubble up.

Conclusion

The DOM is the API and the object with all the elements in tree form which represents HTML and XML nodes. In the browser, we’re mostly concerned with manipulating it to display things on the browser screen.

We do that by manipulating the HTML DOM tree.

Event bubbling is where the event starts from the element that triggered the event and the event goes to the parent, grandparent, etc., all the way to window.

Event capturing is where the event starts from the window then goes to the element that triggered the event and the event goes to the parent, grandparent, etc., all the way to window.

Categories
JavaScript Interview Questions

Basic JavaScript Interview Questions

To get a job as a JavaScript developer, front end or otherwise, we need to nail the coding interview.

In this article, we’ll look at some basic questions and the answers to them.


What’s the Difference Between undefined and null?

They both indicate a non-existent value, but we have to set null explicitly.

On the other hand, undefined is the value for undeclared variables, array positions that have been set with a value, and declared variables that haven’t been set with a value.

Also, null has the type object and undefined has type undefined. They’re both falsy and they are both primitive types.

The following will get us undefined:

let x;
let y = undefined;

Also, array positions that haven’t been assigned a value will also be undefined:

let arr = [];
arr[1];

arr[1] is undefined above.

Holes in arrays are also undefined:

let arr = [,1];
arr[0]

They both convert to false when cast to a boolean as follows:

Boolean(undefined);
Boolean(null);
!!undefined;
!!null;

null equals undefined when compared with the == operator, because they’re falsy. They aren’t equal when we compare them with the === operator since they’re of different types.


What Does the && Operator Do?

The && operator is the AND operator and it finds the first falsy expression and returns it. If there are no falsy expressions then it returns the last expression.

For example, if we have:

let foo = null && undefined && 'foo';

The foo is null since null and undefined are falsy.

If we have:

let foo = true && 'foo';

Then we have 'foo' assigned to foo. It does short-circuit evaluation to prevent unnecessary checks.

It’s also a handy shortcut for:

if (condition){
  doSomething();
}

Because the code above is the same as:

condition && doSomething();

Because, if condition is falsy then doSomething(); won’t run because of short-circuiting.


What Does the || Operator Do?

The || operator is the OR operator. It finds the first truthy expression and returns it.

It also uses short-circuiting to avoid unnecessary checks. Therefore, it’s handy for setting a default value of a variable in case the ones before the default choice are falsy.

For example, if we have:

let foo = null || undefined || 'foo';

Then we have 'foo' as the value of foo.


What Does the + Operator Do?

The + operator has three meanings.

1. Unary +

If it’s put before an expression, it’ll try to convert it to a number. Putting an operator before an expression makes it a unary operator.

For example, if we want to get the UNIX timestamp for the current date-time, we can write:

+new Date();

+new Date(2020,1,1); will return1580544000000.

It’s a fast way to convert a string to a number also. For instance:

+'1'

This returns 1.

Therefore, the unary + operator tries to convert an expression after it. We can convert an expression to a number by wrapping it around parentheses as follows:

+(1 + '1');

Then we get 11 since 1 + ‘1’ returns '11'.

If the expression can’t be converted to a number, it’ll return NaN.

2. Addition operator

If the + operator is between two numbers, it’ll add the two numbers.

For example, if we have:

1 + 2;

Then we get 3.

If we have:

let a = 1, b = 2;
a + b;

We also get 3.

3. Concatenation operator

If one or more operands in the expression aren’t numbers, it’ll try to convert it in different ways.

For example, if we have:

1 + '1'

Or:

'1' + 1

Then we get '11'.

Of course, if we have two strings as operands then the + operator will be used for string concatenation:

'foo' + 'bar';

That’ll return “foobar”.


What’s the Difference Between == and ===?

The difference between == and === is that == only checks the content for equality and === checks both the content and the data type for equality.

For example:

2 == '2'

This will return true since they both have 2 as their content. This is because == does type coercion.

The full list of rules for type coercion for the == operator is:

  1. If x and y have the same value, compare with the === operator.
  2. If x is null and y is undefined, return true.
  3. If x is undefined and y is null, return true.
  4. If x has the number type and y is a string, return x == +y.
  5. If x has the string type and y is a number, return +x == y.
  6. If y has the boolean type, return +x == y.
  7. If y is a boolean, return x == +y.
  8. If x is a string, symbol, or number and y is an object then:
  • Return x == y.valueOf() if y is a String instance.
  • Return x == y.valueOf() if y is a Number instance.
  • Return x == y[Symbol.toPrimitive]() if y is any other kind of object or value.

Conclusion

These are the most basic questions. To nail a JavaScript interview, these are the questions to start studying for.

Categories
JavaScript Interview Questions

JavaScript Interview Questions: Promises

To get a job as a front end developer, we need to nail the coding interview.

Promises are important parts of JavaScript because of the pervasive use of asynchronous programming.

In this article, we’ll look at some common questions about JavaScript promises.

What are Promises?

Promises are one way to handle asynchronous operations in JavaScript. Each promise represents a single operation.

It’s made to solve the problem of combining multiple pieces of asynchronous code in a clean way.

With promises, we can avoid nesting callbacks too deeply.

For example, instead of writing deeply nested callbacks as follows:

const fs = require('fs');

fs.readFile('somefile.txt', function (e, data) {

  fs.readdir('directory', function (e, files) {

    fs.mkdir('directory', function (e) {

    })
  })
})

We write:

const fs = require('fs');

const promiseReadFile = (fileName) => {
  return new Promise((resolve) => {
    fs.readFile('somefile.txt', function(e, data) {
      resolve(data);
    })
  })
}

const promiseReadDir = (directory) => {
  return new Promise((resolve) => {
    fs.readdir(directory, function(e, data) {
      resolve(data);
    })
  })
}

const promiseMakwDir = (directory) => {
  return new Promise((resolve) => {
    fs.mkdir(directory, function(e, data) {
      resolve(data);
    })
  })
}

promiseReadFile('somefile.txt')
.then((data)=>{
  console.log(data);
  return promiseReadDir('directory')
})
.then((data)=>{
  console.log(data);
  return promiseMakwDir('directory')
})
.then((data)=>{
  console.log(data);
})

We chained promises instead of nesting them as follows:

promiseReadFile('somefile.txt')
.then((data)=>{
  console.log(data);
  return promiseReadDir('directory')
})
.then((data)=>{
  console.log(data);
  return promiseMakwDir('directory')
})
.then((data)=>{
  console.log(data);
})

This is why we want to write promises for long chains of promises instead of deeply nested callbacks. It’s much easier to read.

Promises have 3 states. They can be pending, which means the outcome isn’t known yet since the operation hasn’t start yet.

It can be fulfilled, which means that the asynchronous operation is successful and we have the result.

It can also be rejected, which means that it failed and has a reason for why it failed.

A promise can be settled, which means that it’s either fulfilled or rejected.

Also, in the code above, we called the resolve function to return the value of the promise. To get the resolved value of the promise, we get the resolved value from the parameter of the callback.

data in each callback has the data that’s resolved from the promise above it.

To run the next promise in the callback, we returned the next promise.

To reject a promise, we call the reject function in the callback that we pass into the Promise constructor.

For example, we can change the code above to the following:

const fs = require('fs');

const promiseReadFile = (fileName) => {
  return new Promise((resolve, reject) => {
    fs.readFile('somefile.txt', function(e, data) {
      if (e){
        reject(e);
      }
      resolve(data);
    })
  })
}

const promiseReadDir = (directory) => {
  return new Promise((resolve, reject) => {
    fs.readdir(directory, function(e, data) {
      if (e){
        reject(e);
      }
      resolve(data);
    })
  })
}

const promiseMakwDir = (directory) => {
  return new Promise((resolve, reject) => {
    fs.mkdir(directory, function(e, data) {
      if (e){
        reject(e);
      }
      resolve(data);
    })
  })
}

promiseReadFile('somefile.txt')
.then((data)=>{
  console.log(data);
  return promiseReadDir('directory')
})
.then((data)=>{
  console.log(data);
  return promiseMakwDir('directory')
})
.then((data)=>{
  console.log(data);
})
.catch((err)=>{
  console.log(err);
})

Once a promise rejected, the ones that come after it won’t run.

We can get the error details and do something with it in the catch function’s callback like we have above.

In the code above, we converted each asynchronous code into a promise by creating a function and then returning a promise in it that calls resolve to fulfill the promise and reject to reject the promise with an error value.

What is async/await?

async/await is a new way to write promise chains in a shorter way.

For example, instead of calling the then function with a callback like we had above, we rewrite it to:

try {
    const readFileData = await promiseReadFile('somefile.txt');
    console.log(readFileData);
    const readDirData = await promiseReadDir('directory');
    console.log(readDirData);
    const makeFileData = await promiseMakwDir('directory');
    console.log(makeFileData);
    return makeFileData;
  }
  catch(err){
    console.log(err);
  }
})();

This is the same as:

promiseReadFile('somefile.txt')
.then((data)=>{
  console.log(data);
  return promiseReadDir('directory')
})
.then((data)=>{
  console.log(data);
  return promiseMakwDir('directory')
})
.then((data)=>{
  console.log(data);
})
.catch((err)=>{
  console.log(err);
})

As we can see, async/await is much shorter than writing then with callbacks.

We don’t have callbacks and we don’t have to return promises in each callback.

readFileData, readDirData, and makeFileData are the same as the data parameter in each then callback.

try...catch in the async function is the same as the catch call and callback at the end. err has the same error object in both examples.

async functions can only return promises, so makeFileData is actually the resolved value of a promise, not the actual value.

Even though it looks like a synchronous function, it doesn’t behave the same.

Conclusion

Promises are a way to chain asynchronous operations cleanly without deeply nested callbacks.

We can make them even shorter and cleaner with the async/await syntax.