Categories
JavaScript

Introduction to Shared Workers

Shared workers are special web workers that can be accessed by multiple browser contexts like browser tabs, windows, iframes, or other workers, etc.

They’re different from dedicated workers in that they are instances of SharedWorkers and have a different global scope.

All browser contexts must be within the same domain in accordance with the same-origin policy.

In this article, we’ll look at the characteristics of shared and workers and how to create one.

Characteristics of Shared Workers

The difference between dedicated and shared workers is that dedicated workers can only be accessed by one script. Shared workers can be accessed by multiple scripts even if each page run inside different windows.

This enables more flexible communication between multiple scripts.

The scripts that access the workers can do so by accessing it through the MessagePort object created using the SharedWorker.port property. If the onmessage event is attached using addEventListener , then the port is manually started using the start method.

When the port is started multiple scripts can post messages to the worker and handle messages sent using the port.postMessage and port.onmessage respectively.

Other than that, scripts still communicate with the shared worker by communication messages to the worker and get messages back from the worker via scripts.

The SharedWorker constructor also takes an option object with the following options:

  • type : a string specifying the type of worker to create. The value can be classic or module and defaults to classic .
  • credentials : a string specifying the type of credentials to use for the worker. The value can be omit (no credentials required), same-origin or include . If it’s not specified, the type is class then omit is the default.
  • name : a string specifying the identifying name for the SharedWorkerGlobalScope representing the scope of the worker. It’s mainly used for debugging.

The constructor will throw a SecurityError if it’s not allowed to start workers, like if the URL is invalid or same-origin policy is violated.

NetworkError is raised if the MIME type of the worker script is incorrect.

SyntaxError is raised is the worker’s URL can’t be parsed.

Creating and Using a Shared Worker

We can create a shared worker and use it without too much hassle. First, we have to create a shared worker. Then we have to create the scripts to use it. Finally, we add the HTML so that we can do something with it.

Start by creating a scripts folder and add a sharedWorker.js file:

onconnect = (ev) => {  
  const [port] = ev.ports; 
  port.onmessage = e => {  
    const [first, second] = e.data;  
    let sum = +first + +second;  
    if (isNaN(sum)) {  
      port.postMessage("Both inputs should be numbers");  
    }  
    else {  
      const workerResult = `Result: ${sum} `;  
      port.postMessage(workerResult);  
    }  
  };  
};

In the code above, we have an onconnect handler assigned to the onconnect property. Then inside the handler function, we get the port that the shared worker uses to communicate with other scripts.

Next, we assign an event handler to the onmesaage property of the port that we got from the parameter of the onconnect handler. Then we can get the data from the parameter of the onmessage handler to and compute the sum.

Inside the handler, we check if both pieces of data sent from the external scripts are numbers and then add the numbers together if they’re and send them to the scripts.

We have to call port.start(); inside the onconnect event handler at the end if we want to use addEventListener to add a listener to the message event instead of assigning an event handler to onmessage .

Other we send a message back to the external scripts indicating that one or not pieces of data sent aren’t a number.

Then we create a main.js and main2.js in the script.js and add:

const sharedWorker = new SharedWorker("scripts/sharedWorker.js");  
const first = document.getElementById("number1");  
const second = document.getElementById("number2");  
const result = document.getElementById("result");  
sharedWorker.port.start();  
first.onkeyup = () => {  
  sharedWorker.port.postMessage([first.value, second.value]);  
};

second.onkeyup = () => {  
  sharedWorker.port.postMessage([first.value, second.value]);  
};

sharedWorker.port.onmessage = e => {  
  result.textContent = e.data;  
};

We get the input from the HTML file which we’ll create and then send it to our shared worker. We have to use the port of the shared worker to do this as we do by using sharedWorker.port.postMessage .

In:

sharedWorker.port.onmessage = e => {  
  result.textContent = e.data;  
};

We get back the data sent from the shared worker.

Both main.js and main2.js do the same thing but they’re used by different pages.

Finally, create index.html and index2.html and add:

<!DOCTYPE html>  
<html>  
  <head>  
    <title>Add Worker</title>  
  </head>  
  <body>  
    <form>  
      <div>  
        <label for="number1">First Number</label>  
        <input type="text" id="number1" value="0" />  
      </div>  
      <div>  
        <label for="number2">Second Number</label>  
        <input type="text" id="number2" value="0" />  
      </div>  
    </form>  
    <p id="result">Result</p>  
    <script src="scripts/main.js"></script>  
  </body>  
</html>

In the end, we get:

https://thewebdev.info/wp-content/uploads/2020/04/shared-worker.png

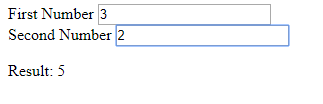
When we go to index.html or index2.html . We should be able to do calculations on both pages without them interfering with each other.

Creating a shared worker isn’t too different from creating and dedicated worker. The constructor arguments are exactly the same. The only difference is that we can use it with more than one script and we need to get the port object to communicate between external scripts and shared workers.

Categories
JavaScript React

Creating 404 and Recursive Paths with React Router

React is a library for creating front end views. It has a big ecosystem of libraries that work with it. Also, we can use it to enhance existing apps.

To build single-page apps, we have to have some way to map URLs to the React component to display.

In this article, we’ll look at how to create 404 routes and recursive paths with React Router.

404 Routes

We can create 404 routes to show something when none of the routes we added are matched.

To do this, we can use the asterisk as a wildcard character.

For example, we can write the following code;

import React from "react";  
import ReactDOM from "react-dom";  
import { BrowserRouter as Router, Switch, Route, Link } from "react-router-dom";

function Foo() {  
  return <h3>Foo</h3>;  
}

function Bar() {  
  return <h3>Bar</h3>;  
}

function NotFound() {  
  return <h3>Not Found</h3>;  
}

function App() {  
  return (  
    <Router>  
      <div>  
        <ul>  
          <li>  
            <Link to="/">Foo</Link>  
          </li>  
          <li>  
            <Link to="/bar">Bar</Link>  
          </li>  
          <li>  
            <Link to="/doesnt-exist">Doesn't Exist</Link>  
          </li>  
        </ul> <Switch>  
          <Route exact path="/">  
            <Foo />  
          </Route>  
          <Route path="/bar">  
            <Bar />  
          </Route>  
          <Route path="*">  
            <NotFound />  
          </Route>  
        </Switch>  
      </div>  
    </Router>  
  );  
}

const rootElement = document.getElementById("root");  
ReactDOM.render(<App />, rootElement);

In the code above, we have the Switch component that has the following Route:

<Route path="\*">  
    <NotFound />  
</Route>

It’ll match any URL that doesn’t match the other routes.

Therefore, when we click the Doesn’t Exist link, we’ll see Not Found.

This also applies when we type in anything other / or /bar as the relative path.

The * is the wildcard character for matching anything.

Recursive Routes

Just like any other routes, we can define routes recursively. The only difference is that we reference the component within the Route with itself.

For example, if we have an array of NEIGHBORS as follows:

const NEIGHBORS = [  
  { id: 0, name: "Jane", neighbors: [1, 2, 3] },  
  { id: 1, name: "Joe", neighbors: [0, 3] },  
  { id: 2, name: "Mary", neighbors: [0, 1, 3] },  
  { id: 3, name: "David", neighbors: [1, 2] }  
];

where the neighbors array references the id of the other entries.

Then we can define a Neighbor component and use it as follows:

import React from "react";  
import ReactDOM from "react-dom";  
import { BrowserRouter as Router, Switch, Route, Link } from "react-router-dom";  
import { useParams, useRouteMatch, Redirect } from "react-router";

const NEIGHBORS = [  
  { id: 0, name: "Jane", neighbors: [1, 2, 3] },  
  { id: 1, name: "Joe", neighbors: [0, 3] },  
  { id: 2, name: "Mary", neighbors: [0, 1, 3] },  
  { id: 3, name: "David", neighbors: [1, 2] }  
];

const find = id => {  
  return NEIGHBORS.find(p => p.id === id);  
};

function Neighbor() {  
  const { url } = useRouteMatch();  
  const { id } = useParams();  
  const neighbor = find(+id); return (  
    <div>  
      <h3>{neighbor.name}’s neighbors</h3> <ul>  
        {neighbor.neighbors.map(id => (  
          <li key={id}>  
            <Link to={`${url}/${id}`}>{find(id).name}</Link>  
          </li>  
        ))}  
      </ul> 
      <Switch>  
        <Route path={`${url}/:id`}>  
          <Neighbor />  
        </Route>  
      </Switch>  
    </div>  
  );  
}

function App() {  
  return (  
    <Router>  
      <Switch>  
        <Route path="/:id">  
          <Neighbor />  
        </Route>  
        <Route path="/">  
          <Redirect to="/0" />  
        </Route>  
      </Switch>  
    </Router>  
  );  
}

const rootElement = document.getElementById("root");  
ReactDOM.render(<App />, rootElement);

In the code above, we have the find function to make find neighbors easy.

Then in the Neighbor component, we have:

const { id } = useParams();  
const neighbor = find(+id);

to get the id from the URL, and then find the neighbor with it using the find function.

Then we display the neighbors of the neighbor by writing:

<ul>  
    {neighbor.neighbors.map(id => (  
    <li key={id}>  
        <Link to={`${url}/${id}`}>{find(id).name}</Link>  
    </li>  
    ))}  
</ul>

Then we have a Switch component that has Neighbor again in the Route :

<Switch>  
    <Route path={`${url}/:id`}>  
        <Neighbor />  
    </Route>  
</Switch>

This is the part that’s recursive, since Neighbor references itself here. We set the path to `${url}/:id` so that when the Link s above is clicked, we’ll see the new neighbors.

Then in App , we just have the usual routes. Once again, we have path=”/:id” to find a neighbor by id .

Conclusion

We can define 404 routes easily by setting the path ‘ value of the Route to an asterisk.

To define recursive routes, we can reference routes within itself. It’s treated no differently than any other kind of route.

Categories
JavaScript React

Lazy Load Your React Code With Code-Splitting

React is a library for creating front-end views. It has a big ecosystem of libraries that work with it. Also, we can use it to enhance existing apps.

In this article, we’ll look at how to make apps load faster by splitting code so that only the parts that are needed will load.


Code-Splitting

We need code-splitting so that product React bundles won’t be too big. As our apps get bigger, the production bundles will also get bigger and take longer to load if we don’t split them and load them only when needed.

Create React App has code-splitting support built-in. We can use the lazy and import functions from React to achieve this.

For example, we can use those functions as follows:

Foo.js:

import React from "react";export default function Foo() {  
  return <div>foo</div>;  
}

App.js:

In the code above, we have Foo.js with the Foo component.

Then, in App.js, we have the App component that has Suspense to load the fallback. UI has the Foo import loads. We need this since Foo is loaded at runtime.

React.lazy loads the Foo component at runtime instead of at build time. It also splits the code from the bundle into a separate file so that each bundled file is smaller.

We’ll get an error telling us to add a fallback UI with the Suspense component if it’s missing.

The fallback prop accepts any React element that we want to render while waiting for the component to load. We can place Suspense anywhere above the lazy component.

Wrapping multiple elements in a single Suspense element also works.


Error Boundaries

To fail gracefully when other modules fail to load, such as where network failure occurs, we can use error boundary components.

To use them, we wrap them around the Suspense component as follows:

ErrorBoundary.js:

Foo.js:

import React from "react";

export default function Foo() {  
  return <div>foo</div>;  
}

App.js:

In the code above, we added the ErrorBoundary component in ErrorBoundary.js.

Then, in App, we wrapped it around our Suspense component, which lets us catch any errors that occur when loading the Foo component.


Route-Based Code-Splitting

Many React apps are single-page apps. They’ll have routes to map URLs to components.

We can split code based on routes. For example, we can incorporate React Router routes into our app and split code based on routes as follows:

Foo.js:

import React from "react";

export default function Foo() {  
  return <div>foo</div>;  
}

Bar.js:

import React from "react";

export default function Bar() {  
  return <div>bar</div>;  
}

App.js:

In the example above, we add the Router component around all our components.

We put the Routes inside the Suspense component so that they can be lazy-loaded. That is, they load only when we load the route in our browser.

This is also why we need the Suspense component around the routes. We need the fallback UI so that it’ll be shown when the routes are loading.


Named Exports

React.lazy only supports default exports. If our module uses named exports, then we have to create an intermediate module that re-exports it as default.

For example, we can arrange our code as follows:

Foo.js:

import React from "react";

export const Foo = function() {  
  return <div>foo</div>;  
};

FooDefault.js:

import { Foo } from "./Foo";

export default Foo;

App.js:

import React, { Suspense } from "react";
const FooComponent = React.lazy(() => import("./Foo"));
export default function App() {
  return (
    <Suspense fallback={<div>Loading...</div>}>
      <FooComponent />
    </Suspense>
  );
}

In the code above, we have FooDefault.js that exports Foo as a default export.

Then, we imported it in App.js with React.lazy.


Conclusion

Code-splitting is easy with Create React App and React. React has the lazy method to import components on the fly.

We need a fallback UI so that we can see something when the dynamically imported component loads.

Error boundaries are also supported and we can use it to gracefully fail when a dynamically imported component fails to load.

Code-splitting is also supported by React Router. React.lazy is smart enough to split code by route.

Categories
JavaScript React

Creating Sidebars with React Router

React is a library for creating front end views. It has a big ecosystem of libraries that work with it. Also, we can use it to enhance existing apps.

To build single-page apps, we have to have some way to map URLs to the React component to display.

In this article, we’ll look at how to create sidebars with route content only displaying in a portion of the screen with React Router.

Creating Sidebar

We can easily create a fixed sidebar on one side of the screen while displaying route content on the other.

To do this, we just need to add our sidebar on one side with links and the Switch and Route components on the other.

For example, we can write the following code to achieve this effect:

import React from "react";  
import ReactDOM from "react-dom";  
import { BrowserRouter as Router, Switch, Route, Link } from "react-router-dom";

const routes = [  
  {  
    path: "/",  
    exact: true,  
    sidebar: () => <div>home</div>,  
    main: () => <h2>Home</h2>  
  },  
  {  
    path: "/foo",  
    sidebar: () => <div>foo</div>,  
    main: () => <h2>Bubblegum</h2>  
  },  
  {  
    path: "/shoelbaraces",  
    sidebar: () => <div>bar</div>,  
    main: () => <h2>Shoelaces</h2>  
  }  
];

function App() {  
  return (  
    <Router>  
      <div style={{ display: "flex" }}>  
        <div  
          style={{  
            padding: "10px",  
            width: "40%",  
            background: "pink"  
          }}  
        >  
          <ul style={{ listStyleType: "none", padding: 0 }}>  
            <li>  
              <Link to="/">Home</Link>  
            </li>  
            <li>  
              <Link to="/foo">Foo</Link>  
            </li>  
            <li>  
              <Link to="/bar">Bar</Link>  
            </li>  
          </ul> <Switch>  
            {routes.map((route, index) => (  
              <Route  
                key={index}  
                path={route.path}  
                exact={route.exact}  
                children={<route.sidebar />}  
              />  
            ))}  
          </Switch>  
        </div> <div style={{ flex: 1, padding: "10px" }}>  
          <Switch>  
            {routes.map((route, index) => (  
              <Route  
                key={index}  
                path={route.path}  
                exact={route.exact}  
                children={<route.main />}  
              />  
            ))}  
          </Switch>  
        </div>  
      </div>  
    </Router>  
  );  
}

const rootElement = document.getElementById("root");  
ReactDOM.render(<App />, rootElement);

In the code above, we have the sidebar in the top of App . And we have the routes array as follows:

const routes = [  
  {  
    path: "/",  
    exact: true,  
    sidebar: () => <div>home</div>,  
    main: () => <h2>Home</h2>  
  },  
  {  
    path: "/foo",  
    sidebar: () => <div>foo</div>,  
    main: () => <h2>Bubblegum</h2>  
  },  
  {  
    path: "/shoelbaraces",  
    sidebar: () => <div>bar</div>,  
    main: () => <h2>Shoelaces</h2>  
  }  
];

In the outermost div of App , we have display: 'flex' style to display the sidebar and the route content side by side, with the sidebar of the left and the route content on the right.

The sidebar is composed of the following code in App :

<div style={{ padding: "10px", width: "40%", background: "#f0f0f0" }}>  
    <ul style={{ listStyleType: "none", padding: 0 }}>  
        <li>  
            <Link to="/">Home</Link>  
        </li>  
        <li>  
            <Link to="/foo">Foo</Link>  
        </li>  
        <li>  
            <Link to="/bar">Bar</Link>  
        </li>  
    </ul>  
    <Switch>  
        {routes.map((route, index) => (  
        <Route key={index} path={route.path} exact={route.exact} children={<route.sidebar />} /> ))}  
    </Switch>  
</div>

In the code above, we have the ul element to display the Link s, which we can click on the show the route that we want.

In the Switch component, we have the routes array mapped to Route s that we want to display in the sidebar.

We want to display the component we set as the value of the sidebar in each entry of routes . Therefore, we set children to that.

In the routes array, we have the route with path set to '/' has the exact property set to true .

We have to do this so that React Router won’t direct all routes that start with a / to the ‘home’ route. This is because React Router doesn’t look at the other routes once it found a match.

If the match isn’t exact, then it’ll take anything that starts with a / as the correct match. In this case, it’ll be the first route.

The right side is composed of the following code:

<div style={{ flex: 1, padding: "10px" }}>  
    <Switch>  
        {routes.map((route, index) => (  
        <Route key={index} path={route.path} exact={route.exact} children={<route.main />} /> ))}  
    </Switch>  
</div>

The code above maps the routes array again to Route s, but we set the children prop to the components set to the main property instead of sidebar .

Conclusion

We can create a sidebar easily by using flexbox and the Switch and Route components.

As long as we have Switch and Route components in only one portion of the screen, the route content will only be displayed on that part of the screen.

Flexbox lets us display items side by side without hassle.

Categories
JavaScript Vue

Vue Router 4 — Navigation

Vue Router 4 is in beta and it’s subject to change.

To build a single page app easily, we got to add routing so that URLs will be mapped to components that are rendered.

In this article, we’ll look at how to use Vue Router 4 with Vue 3.

Navigation

We can navigate to a route with the this.$router ‘s methods.

For example, we can write:

<!DOCTYPE html>
<html lang="en">
  <head>
    <script src="https://unpkg.com/vue@next"></script>
    <script src="https://unpkg.com/vue-router@4.0.0-beta.7/dist/vue-router.global.js"></script>
    <title>App</title>
  </head>
  <body>
    <div id="app">
      <p>
        <router-link to="/foo">Go to Foo</router-link>
        <router-link to="/bar">Go to Bar</router-link>
        <a @click="goBack" href="#">Go Back</a>
      </p>
      <router-view></router-view>
    </div>
    <script>
      const Foo = { template: "<div>foo</div>" };
      const Bar = { template: "<div>bar</div>" };

      const routes = [
        { path: "/foo", component: Foo },
        { path: "/bar", component: Bar }
      ];

      const router = VueRouter.createRouter({
        history: VueRouter.createWebHistory(),
        routes
      });

      const app = Vue.createApp({
        methods: {
          goBack() {
            window.history.length > 1
              ? this.$router.go(-1)
              : this.$router.push("/foo");
          }
        }
      });
      app.use(router);
      app.mount("#app");
    </script>
  </body>
</html>

to create a goBack method and call it when we click on the Go Back link.

In the method, we check if there are anything in the browser history.

If there is, then we go back to the previous page.

Otherwise, we go to the /foo page.

Reacting to Params Changes

We can react to route params changes in a few ways.

For instance, we can write:

<!DOCTYPE html>
<html lang="en">
  <head>
    <script src="https://unpkg.com/vue@next"></script>
    <script src="https://unpkg.com/vue-router@4.0.0-beta.7/dist/vue-router.global.js"></script>
    <title>App</title>
  </head>
  <body>
    <div id="app">
      <p>
        <router-link to="/foo/1">Foo 1</router-link>
        <router-link to="/foo/2">Foo 2</router-link>
      </p>
      <router-view></router-view>
    </div>
    <script>
      const Foo = {
        template: "<div>foo</div>",
        watch: {
          $route(to, from) {
            console.log(to, from);
          }
        }
      };

      const routes = [{ path: "/foo/:id", component: Foo }];

      const router = VueRouter.createRouter({
        history: VueRouter.createWebHistory(),
        routes
      });

      const app = Vue.createApp({});
      app.use(router);
      app.mount("#app");
    </script>
  </body>
</html>

We have the /foo/:id route that maps to the Foo component.

And in the Foo component, we have the $route watcher to watch the route.

to has the route to go to. from has the route that we departed from.

They’re both objects with the path, route metadata, route parameters, query parameters, and more.

Also, we can use the beforeRouteUpdate method to watch for route changes:

<!DOCTYPE html>
<html lang="en">
  <head>
    <script src="[https://unpkg.com/vue@next](https://unpkg.com/vue@next)"></script>
    <script src="[https://unpkg.com/vue-router@4.0.0-beta.7/dist/vue-router.global.js](https://unpkg.com/vue-router@4.0.0-beta.7/dist/vue-router.global.js)"></script>
    <title>App</title>
  </head>
  <body>
    <div id="app">
      <p>
        <router-link to="/foo/1">Foo 1</router-link>
        <router-link to="/foo/2">Foo 2</router-link>
      </p>
      <router-view></router-view>
    </div>
    <script>
      const Foo = {
        template: "<div>foo</div>",
        beforeRouteUpdate(to, from, next) {
          console.log(to, from);
          next();
        }
      };

      const routes = [{ path: "/foo/:id", component: Foo }];

      const router = VueRouter.createRouter({
        history: VueRouter.createWebHistory(),
        routes
      });

      const app = Vue.createApp({});
      app.use(router);
      app.mount("#app");
    </script>
  </body>
</html>

Instead of watching the $route object, we have the beforeRouteUpdate hook, which is made available with the app.use(router) call.

Now when we click on the links, we’ll see the same data as we did with the watcher.

The only difference is that we call next to move to the next route.

Conclusion

We can watch for navigation with watchers or hooks with Vue Router 4.