Building Android apps can be a pain. You have to learn the Android SDK inside-out to be productive.
However, if you already have experience developing modern front-end web applications, then building Android apps can be fun and easy.
The Ionic framework provides an easy way for front-end developers to build their web applications using Angular components that Ionic developers provide.
Version 4 of Ionic also has components for React and Vue.js, so you can use your favorite front-end framework to build Android apps.
Ionic is used to build applications. It has components for inputs, grids, scrolling, date and time pickers, cards, and other common components that Android applications have.
In this piece, we will build a currency converter.
Building the App
To start building, we can use Ionic’s CLI. If you’ve used Angular’s CLI, it should be familiar to you.
To install the Ionic CLI, run npm install -g ionic.
Then, to generate the skeleton code for our app, run ionic start currency-converter-mobile sidemenu.
currency-converter-mobile is our app’s name and sidemenu specifies that we want a side menu in our app.
We also need to install ngx-custom-validators for form validation. We need this package because number-range validation is not built-in in Angular.
After that, we can run ionic serve to see our app in the browser. The browser tab should refresh automatically when we make changes.
Now, we can start writing code for the currency converter.
Run ng g service currency.
This will create currency.service.ts.
In this file, we add:
import { Injectable } from '@angular/core';
import { HttpClient } from '@angular/common/http';

const APIURL = 'https://api.exchangeratesapi.io'

@Injectable({
  providedIn: 'root'
})
export class CurrencyService {

  constructor(
    private httpClient: HttpClient
  ) { }

  getLatest() {
    return this.httpClient.get(`${APIURL}/latest`);
  }

  getExchangeRate(from: string, to: string) {
    return this.httpClient.get(`${APIURL}/latest?base=${from}&symbols=${to}`);
  }
}
This allows us to get currency exchange data from https://exchangeratesapi.io/.
Then, run ionic g component convertPage and ionic g component homePage to add our currency converter form and home page, respectively.
The home page is the entry point of our Android app, just like a regular web app.
Then, in app-routing.module.ts, we change the code to:
import { NgModule } from '@angular/core';
import { PreloadAllModules, RouterModule, Routes } from '@angular/router';
import { HomePageComponent } from './home-page/home-page.component';
import { ConvertPageComponent } from './convert-page/convert-page.component';

const routes: Routes = [
  {
    path: '',
    redirectTo: 'home',
    pathMatch: 'full'
  },
  {
    path: 'home',
    component: HomePageComponent
  },
  {
    path: 'convert',
    component: ConvertPageComponent
  }
];

@NgModule({
  imports: [
    RouterModule.forRoot(routes, { preloadingStrategy: PreloadAllModules })
  ],
  exports: [RouterModule]
})
export class AppRoutingModule { }
In app.component.ts, we replace what’s there with:
import { Component } from '@angular/core';

import { Platform } from '@ionic/angular';
import { SplashScreen } from '@ionic-native/splash-screen/ngx';
import { StatusBar } from '@ionic-native/status-bar/ngx';
import { environment } from 'src/environments/environment';

@Component({
  selector: 'app-root',
  templateUrl: 'app.component.html'
})
export class AppComponent {
  public appPages = [
    {
      title: 'Home',
      url: '/home',
      icon: 'home'
    },
    {
      title: 'Convert Currency',
      url: '/convert',
      icon: 'cash'
    }
  ];

  constructor(
    private platform: Platform,
    private splashScreen: SplashScreen,
    private statusBar: StatusBar,
  ) {
    this.initializeApp();
  }

  initializeApp() {
    this.platform.ready().then(() => {
      this.statusBar.styleDefault();
      this.splashScreen.hide();
    });
  }
}
And, in app.component.html, we replace the default code with:
<ion-app>
  <ion-split-pane>
    <ion-menu type="overlay">
      <ion-header>
        <ion-toolbar>
          <ion-title>Menu</ion-title>
        </ion-toolbar>
      </ion-header>
      <ion-content>
        <ion-list>
          <ion-menu-toggle auto-hide="false" *ngFor="let p of appPages">
            <ion-item [routerDirection]="'root'" [routerLink]="[p.url]">
              <ion-icon slot="start" [name]="p.icon"></ion-icon>
              <ion-label>
                {{p.title}}
              </ion-label>
            </ion-item>
          </ion-menu-toggle>
        </ion-list>
      </ion-content>
    </ion-menu>
    <div class="ion-page" main>
      <ion-header>
        <ion-toolbar>
          <ion-buttons slot="start">
            <ion-menu-button>
              <ion-icon name="menu"></ion-icon>
            </ion-menu-button>
          </ion-buttons>
          <ion-title>Currency Converter</ion-title>
        </ion-toolbar>
      </ion-header>
      <ion-content>
        <ion-router-outlet main></ion-router-outlet>
      </ion-content>
    </div>
  </ion-split-pane>
</ion-app>
In convert-page.component.ts, we replace what we have with:
import { Component, OnInit, ChangeDetectorRef } from '@angular/core")';
import { currencies as c } from '../currencies';
import { CurrencyService } from '../currency.service';
import { NgForm } from '@angular/form")';
import { ToastController } from '@ionic/angular';
import { Store, select } from '@ngrx/store")';

const currencies = c;

@Component({
  selector: 'app-convert-page',
  templateUrl: './convert-page.component.html',
  styleUrls: ['./convert-page.component.scss'],
})
export class ConvertPageComponent implements OnInit {
  currencyOptions: any = <any>{};
  fromCurrencies: any[] = Object.assign([], currencies);
  toCurrencies: any[] = Object.assign([], currencies);
  result: any = <any>{};
  showResult: boolean;

  constructor(
    private currencyService: CurrencyService,
    public toastController: ToastController,
    private store: Store<any>
  ) {
    store.pipe(select('recentCoversion'))
      .subscribe(recentCoversion => {
        if (!recentCoversion) {
          return;
        }
        this.currencyOptions = recentCoversion;
      });
  }

  ngOnInit() { }

  setToCurrencies(event) {
    if (!event.detail || !event.detail.value) {
      return;
    }
    this.toCurrencies = Object.assign([], currencies.filter(c => c.abbreviation != event.detail.value));
  }

  setFromCurrencies(event) {
    if (!event.detail || !event.detail.value) {
      return;
    }
    this.fromCurrencies = Object.assign([], currencies.filter(c => c.abbreviation != event.detail.value));
  }

  convert(convertForm: NgForm) {
    this.showResult = false;
    if (convertForm.invalid) {
      return;
    }
    this.currencyService.getExchangeRate(this.currencyOptions.from, this.currencyOptions.to)
      .subscribe((res: any) => {
        let recentConversions = [];
        if (localStorage.getItem('recentConversions')) {
          recentConversions = JSON.parse(localStorage.getItem('recentConversions'));
        }
        recentConversions.push(this.currencyOptions);
        recentConversions = Array.from(new Set(recentConversions));
        localStorage.setItem('recentConversions', JSON.stringify(recentConversions));
        const rate = res.rates[this.currencyOptions.to];
        this.result = +this.currencyOptions.amount * rate;
        this.showResult = true;
      }, err => {
        this.showError();
      })
  }

  async showError() {
    const toast = await this.toastController.create({
      message: 'Exchange rate not found.',
      duration: 2000
    });
    toast.present();
  }
}
And, in convert-page.component.html, we replace what we have with:
<ion-content [scrollEvents]="true">
  <form #convertForm='ngForm' (ngSubmit)='convert(convertForm)'>
    <ion-list>
      <ion-item no-padding>
        <h1>Convert Currency</h1>
      </ion-item>
      <ion-item no-padding>
        <ion-label>Amount</ion-label>
        <ion-input [(ngModel)]='currencyOptions.amount' name='amount' #amount='ngModel' required [min]='0'></ion-input>
      </ion-item>
      <ion-item no-padding>
        <ion-label>Currencies to Convert From</ion-label>
        <ion-select [(ngModel)]='currencyOptions.from' name='from' #from='ngModel' required
          (ionChange)='setToCurrencies($event)' (ionBlur)='setToCurrencies($event)'>
          <ion-select-option [value]='c.abbreviation' *ngFor='let c of fromCurrencies; let i = index'>
            {{c.currency}}
          </ion-select-option>
        </ion-select>
      </ion-item>
      <ion-item no-padding>
        <ion-label>Currencies to Convert To</ion-label>
        <ion-select [(ngModel)]='currencyOptions.to' name='to' #to='ngModel' required
          (ionChange)='setFromCurrencies($event)' (ionBlur)='setFromCurrencies($event)'>
          <ion-select-option [value]='c.abbreviation' *ngFor='let c of toCurrencies; let i = index'>
            {{c.currency}}
          </ion-select-option>
        </ion-select>
      </ion-item>
    </ion-list>
    <ion-button type='submit'>Convert</ion-button>
    <ion-list *ngIf='showResult'>
      <ion-item no-padding>
        {{currencyOptions.amount}} {{currencyOptions.from}} is {{result}} {{currencyOptions.to}}.
      </ion-item>
    </ion-list>
  </form>
</ion-content>
The code above will provide a form for people to enter their currency amount in the ion-input element. Then, with the two ion-select elements, you can select the currency to convert from and to.
It will also remove the currency you already selected from the choices in the drop-down that doesn’t have selection applied. This is achieved by handling the ionChanged event and then removing the value that is selected from the ion-select.
Then, in home-page.component.ts:
import { Component, OnInit } from '@angular/core';
import { CurrencyService } from '../currency.service';
import { Store } from '@ngrx/store';
import { SET_RECENT_CONVERSION } from '../reducers/recent-coverions-reducer';
import { Router } from '@angular/router';

@Component({
  selector: 'app-home-page',
  templateUrl: './home-page.component.html',
  styleUrls: ['./home-page.component.scss'],
})
export class HomePageComponent implements OnInit {
  rates: any = <any>{};
  recentConversions: any[] = []

constructor(
    private currencyService: CurrencyService,
    private store: Store<any>,
    private router: Router,
  ) {
    router.events.subscribe((val) => this.recentConversions = this.getRecentConversions())
  }

  ngOnInit() {
    this.getLatest();
    this.recentConversions = this.getRecentConversions();
  }

  getLatest() {
    this.currencyService.getLatest()
      .subscribe(res => {
        this.rates = res;
      })
  }
}
In home-page.compone.html, change to:
<ion-content [scrollEvents]="true">
  <ion-list>
    <ion-item no-padding>
      <h1>Currency Exchange Rates</h1>
    </ion-item>
    <ion-item no-padding *ngFor='let r of rates.rates | keyvalue'>
      USD : {{r.key}} - 1 : {{r.value}}
    </ion-item>
  </ion-list>
</ion-content>
Finally, in app.module.ts, replace what we have with:
import { NgModule } from '@angular/core';
import { BrowserModule } from '@angular/platform-browser';
import { RouteReuseStrategy } from '@angular/router';

import { IonicModule, IonicRouteStrategy } from '@ionic/angular';
import { SplashScreen } from '@ionic-native/splash-screen/ngx';
import { StatusBar } from '@ionic-native/status-bar/ngx';

import { AppComponent } from './app.component';
import { AppRoutingModule } from './app-routing.module';
import { HomePageComponent } from './home-page/home-page.component';
import { ConvertPageComponent } from './convert-page/convert-page.component';
import { HttpClientModule } from '@angular/common/http';
import { FormsModule } from '@angular/forms';
import { CustomFormsModule } from 'ngx-custom-validators';
import { CurrencyService } from './currency.service';
import { StoreModule } from '@ngrx/store';
import { reducers } from './reducers';
import { AdMobFree } from '@ionic-native/admob-free/ngx';

@NgModule({
  declarations: [
    AppComponent,
    HomePageComponent,
    ConvertPageComponent
  ],
  entryComponents: [],
  imports: [
    BrowserModule,
    IonicModule.forRoot(),
    AppRoutingModule,
    HttpClientModule,
    FormsModule,
    CustomFormsModule
  ],
  providers: [
    StatusBar,
    SplashScreen,
    { provide: RouteReuseStrategy, useClass: IonicRouteStrategy },
    CurrencyService
  ],
  bootstrap: [AppComponent]
})
export class AppModule { }
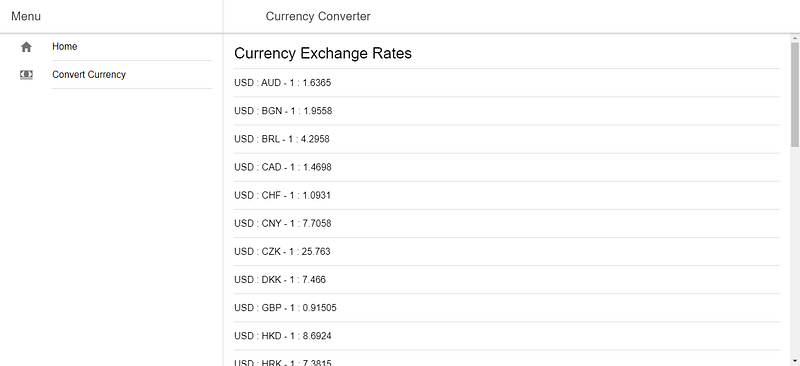
You should see a list of current exchanges when you go to [http://localhost:8100/home](http://localhost:8100/home).

Testing in the Genymotion Emulator
It is easy to test it in Genymotion. First, sign up for a Genymotion account, download Genymotion, and install it following the instructions. Then, run the program.
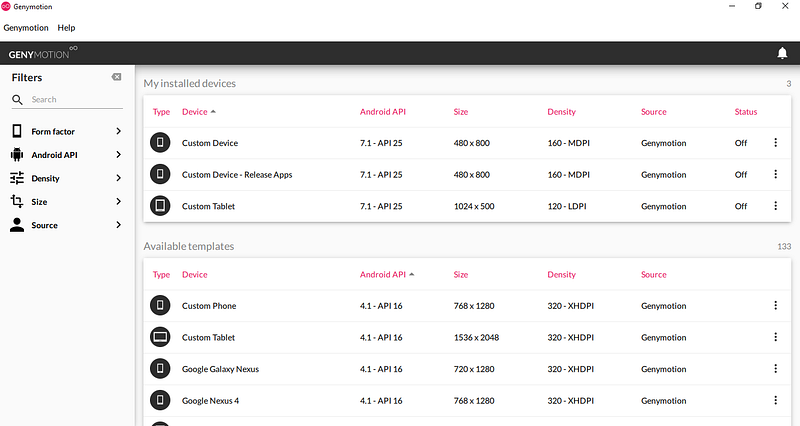
Once you open Genymotion, add an emulator by selecting what is available in the available templates section.
Once you add an emulator, you should see something like this:

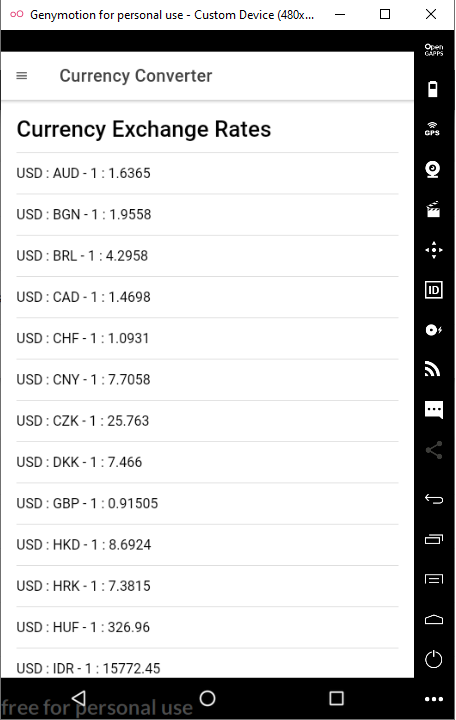
Doubling-click on your emulator. Once you do that, you should see the emulator window. Run ionic cordova run android in the Node command prompt to see the app running in Genymotion.
Once the command is finished, you should see:

Building for Production
First, you have to sign your app. To do this, you have to run a command to generate keystore:
keytool -genkey -v -keystore my-release-key.jks -keyalg RSA -keysize 2048 -validity 10000 -alias my-alias
Run ionic cordova build — prod — release android to build the app in production mode.
After that, you can sign it with your keystore by running:
jarsigner -verbose -sigalg SHA1withRSA -digestalg SHA1 -keystore path/to/my-release-key.jks path/to/app-release-unsigned.apk alias_name
Optimize the APK by running [zipalign](https://developer.android.com/studio/command-line/zipalign):
zipalign -v 4 app-release-unsigned.apk currency-converter-mobile.apk
You’ll get a signed APK that you can submit to Android app stores, such as Google Play and Amazon.
Ionic makes it easy to build Android applications that don’t require too much native functionality, such as interacting with hardware.
With recent advances in HTML APIs for interacting with hardware, such as microphones, Ionic is going to be more useful for building these kinds of apps.
Performance is decent compared to native for simple apps and it is a lot easier to develop.
